Being the first carpool app in Singapore, Ryde has revolutionized how people move from point to point. Whether it’s carpooling, ride-hailing, or delivery, Ryde’s full suite of services reimagines the way people and goods move around; where communities are brought closer, and commuting is made sustainable.
Our Services
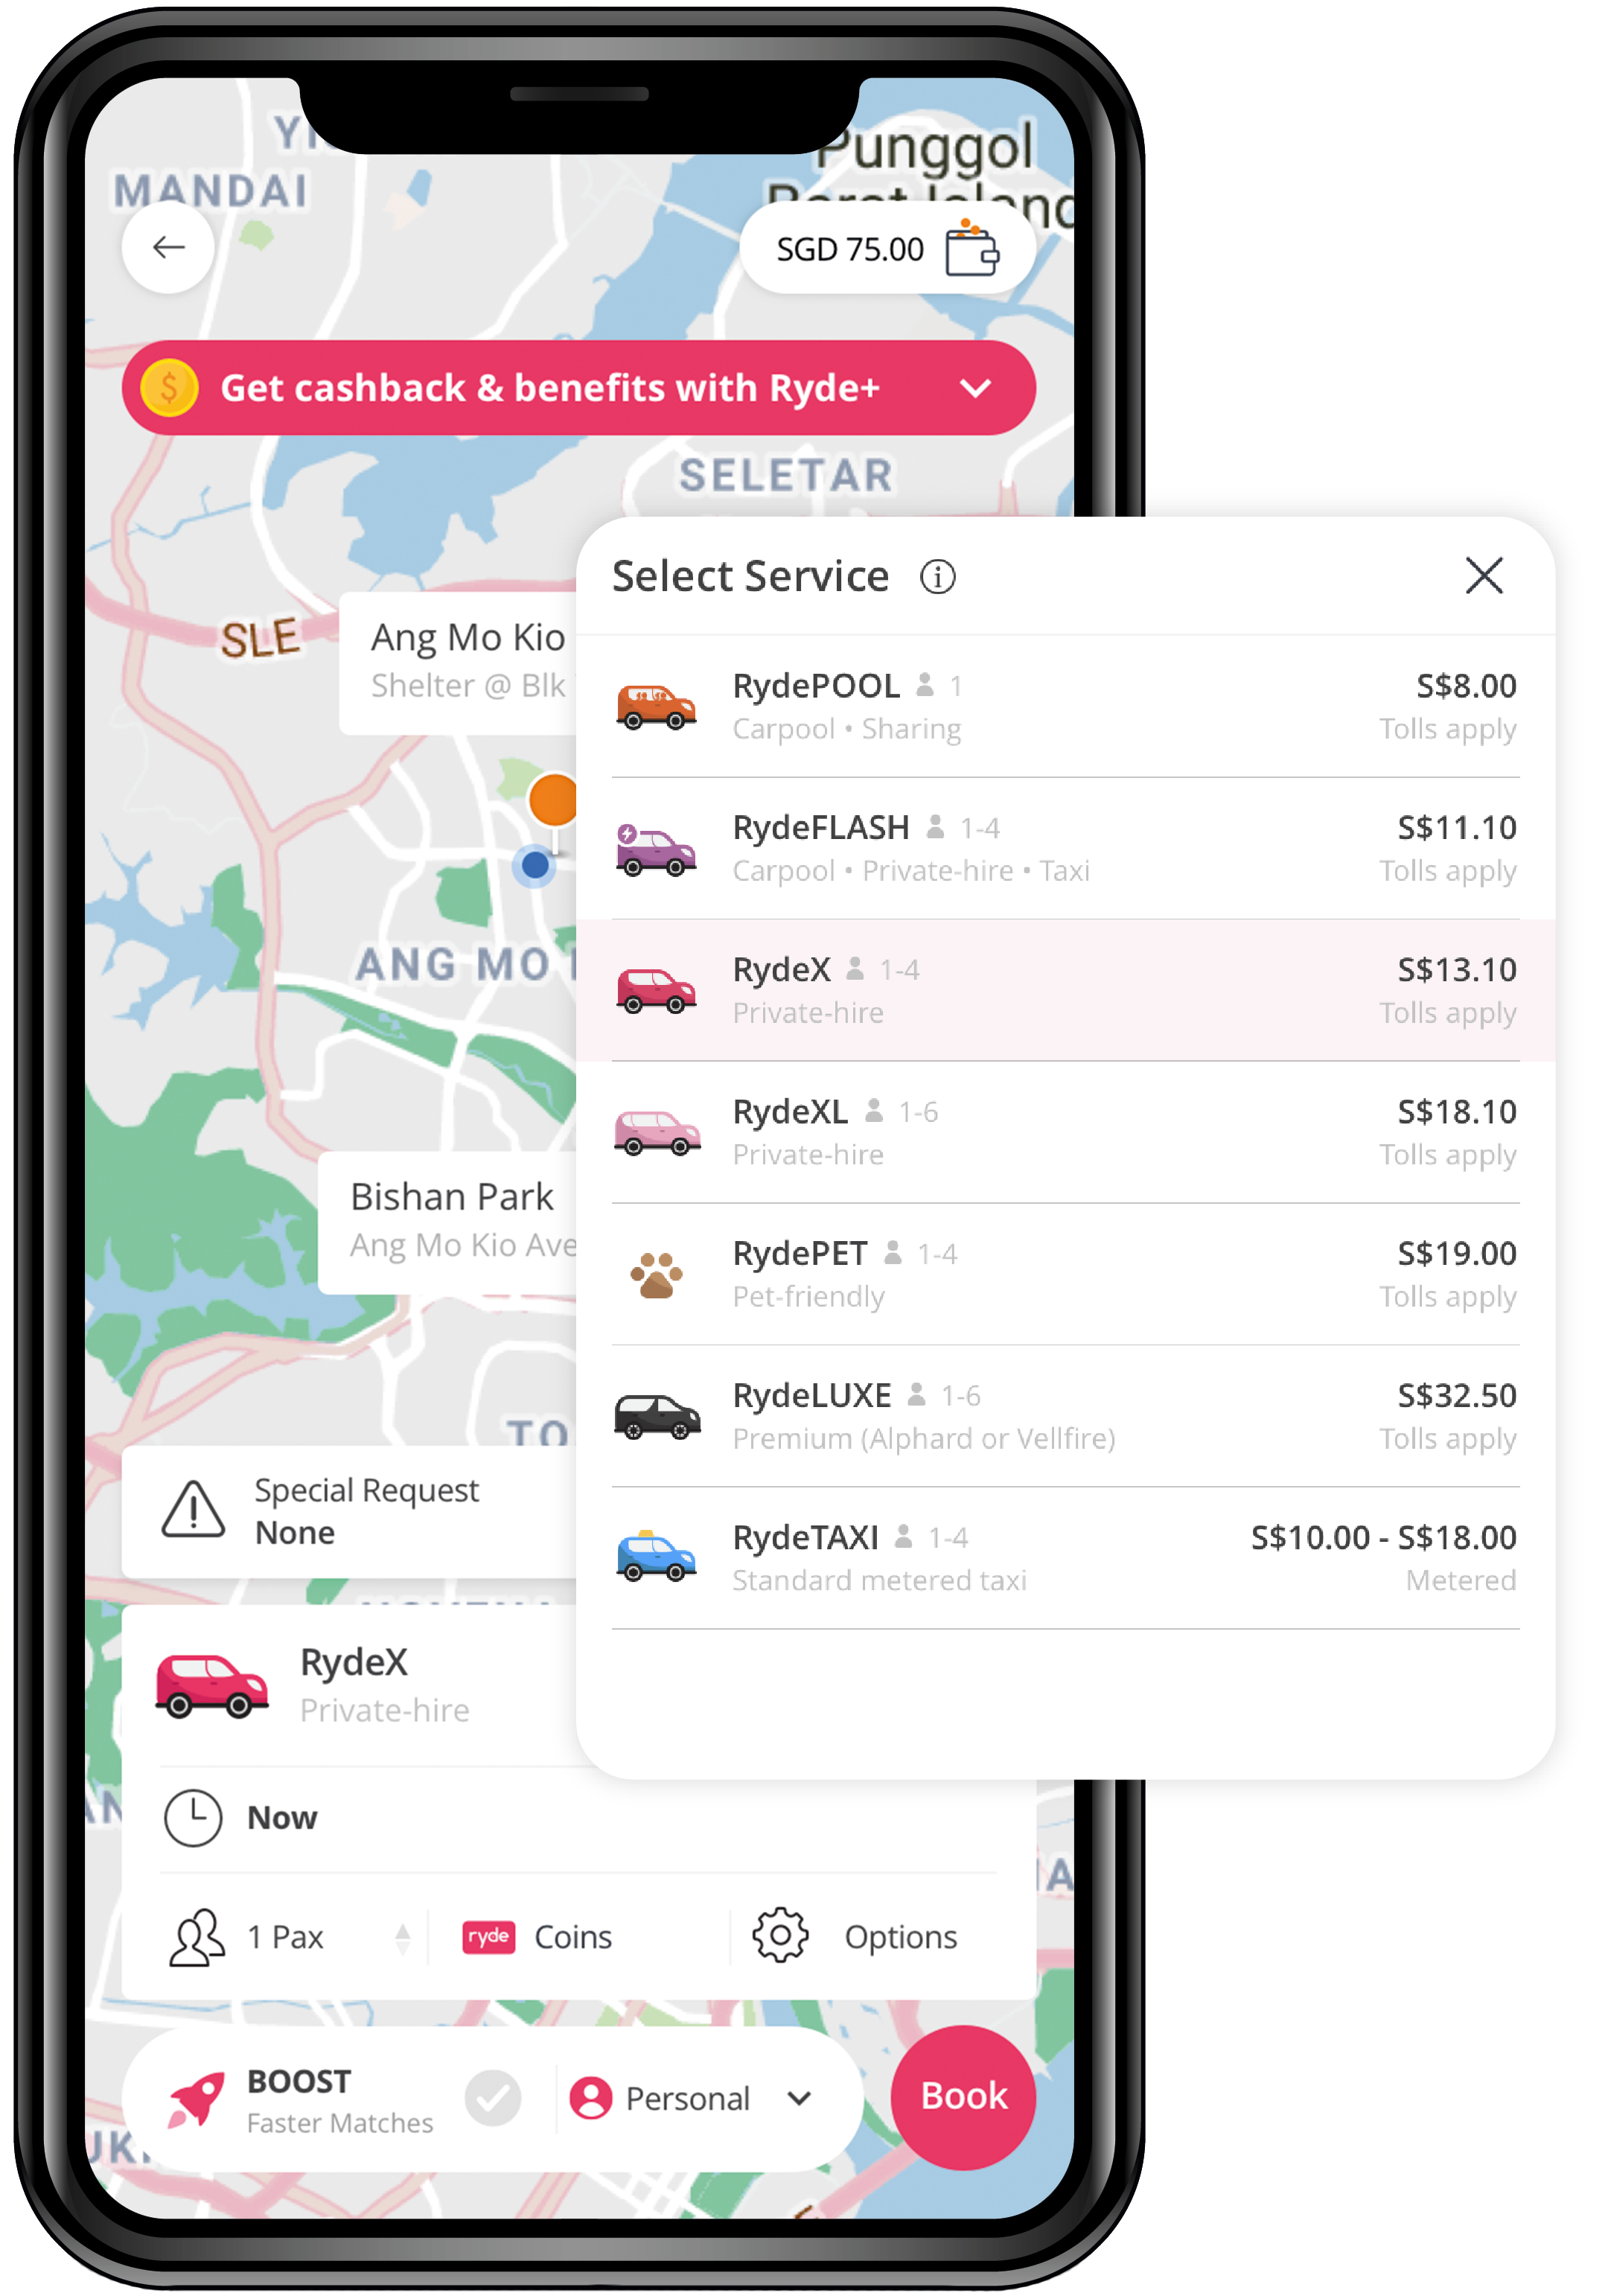
Ride-hailing
A wide variety of private-hire services suited to your budget and needs.
Delivery
On-demand point to point delivery service for personal or business needs.
Carpooling
Share a Ryde, save the environment and make new friends.